JIUNGE NASI WHATSAPP TU FOLLOW. BONYEZA HAPASurvival Guide to LionPATH Schedule of Courses
Survival Guide to LionPATH Schedule of Courses Each semester, Penn State University provides a wide range of courses, which are included in the LionPATH Schedule of Courses.
The Penn State LionPATH course schedule for 2022 and instructions for scheduling classes as a PSU student are provided below.
Pre-registration tasks
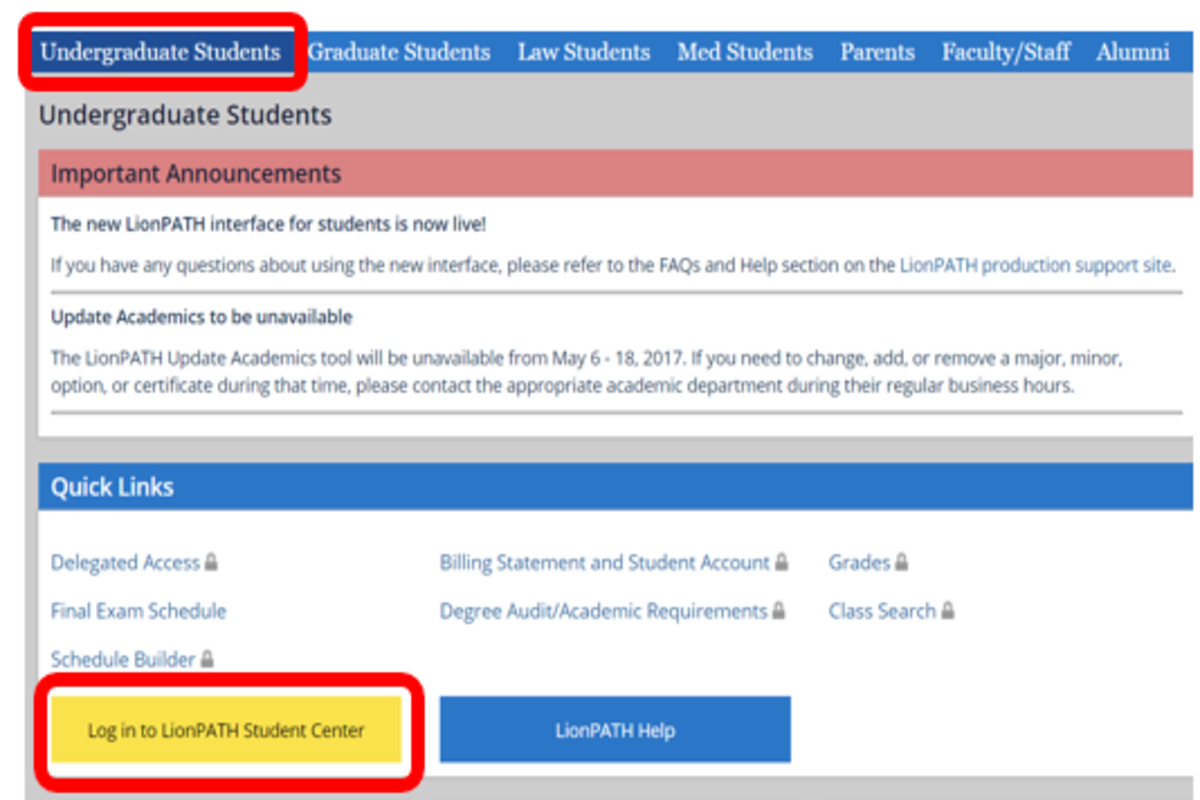
Visit the website lionpath.psu.edu.
Select Self-Service.
Click the Student Center link.
Accept electronic transactions when LionPATH invites you to do so.
Click the link in the To-Do List box on the right side of the page to access the Pre-Registration Activity Guide. Complete all of the tasks given on the left side of the screen in the Student Task Work Center.
Select Self-Service followed by Student Center by clicking on the Main Menu tab at the top of the page.
Choosing courses and a schedule
Find the section on Academics. Underneath this header are the primary tools you will employ.
This search allows you to examine which Fall 2016 courses are available. Click through this little training to understand how to use this tool effectively: tutorials.lionpath.psu.edu/public/Search/ Plan: This allows you to create an eight-semester academic plan.
This link takes you to your enrollment shopping basket, which lists the courses you’ve selected.
My Academics enables you to locate your academic advisor, transfer credits, course history, transcript, graduation information, and more.
Schedule Builder enables the creation of a semester schedule that can be imported into the enrollment shopping cart.
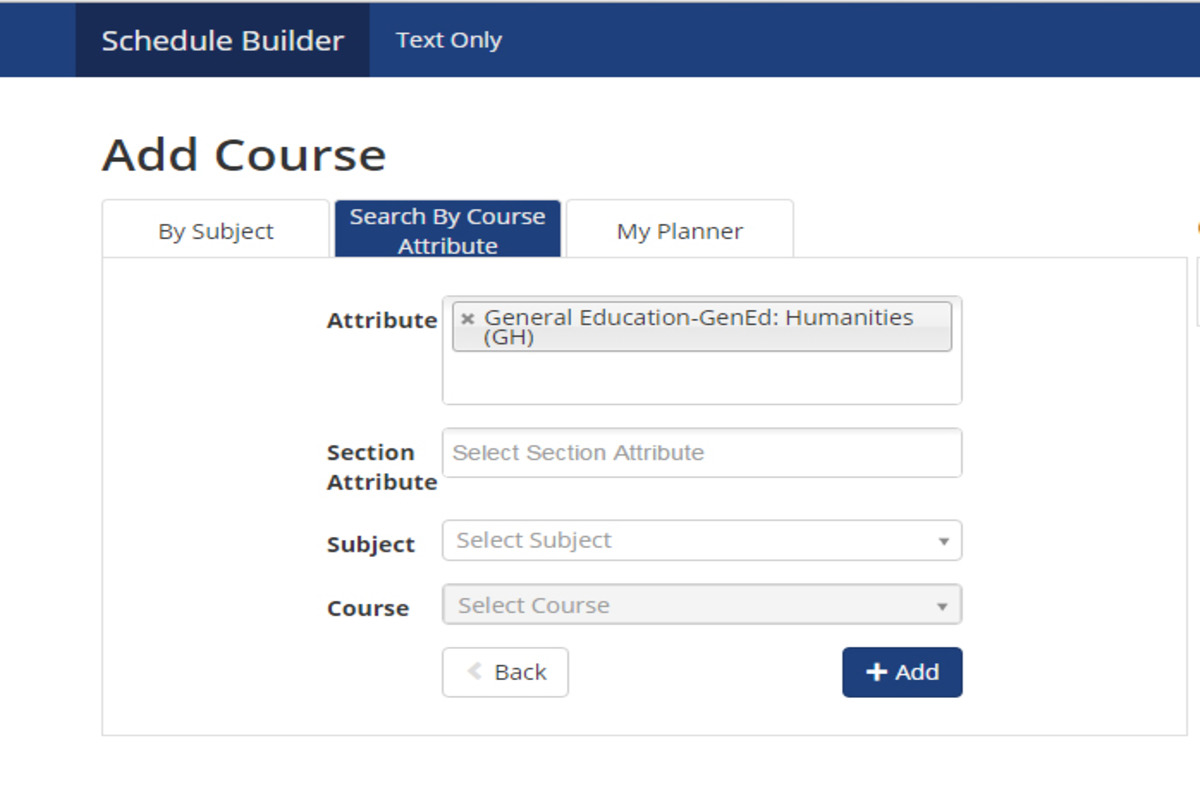
To construct a schedule, choose Schedule Builder.
Select the green Click Here link. (If necessary, permit pop-ups from lion.psu.edu to prevent the Schedule Builder window from being blocked)
Modify the search parameters.
Click the Add Course button. Select a topic and course number. It may take a few moments for course numbers to populate, especially when transitioning between subjects.
To add a course to your schedule, click the “Add” button.
After adding all of your courses, click the Back button to the left of the Add button to return to the Schedule Builder homepage. Do not use your browser’s back button!
Click the Possibilities icon next to each class to further reduce your options (e.g., to remove all Honors sections).
To block time slots on your schedule, click the Add Break button.
To examine all possible schedules that include your desired courses, click Generate Schedules.
Select your favorite timetable and then click Add to Cart.
To exit, close the Schedule Builder window.
Verifying your enrollment cart
Return to the LionPath home page’s Student Center.
Under Academics, select Enrollment Shopping Cart from the drop-down menu.
Choose the correct semester.
select “Import Cart” (in the yellow alert box).
As you review each particular course you have selected, click Next. When you’re finished, you’ll be able to see everything in your enrollment shopping cart at once.
To confirm that you are authorized to schedule all of the courses you’ve selected, click Validate at the bottom of the page.
Go back to the shopping cart for enrollment.
How to add a class
Through LionPATH, students can enroll in a course. You have until the last day of the usual add period to add a class to your schedule.
the Add Classes page is reached through navigation
Select the Enrollment button from the Student Home Base.
You’ll see the Add Classes page. If prompted, choose the term for which you want to switch classes, then click Continue.
You can sign up for classes by typing in the class number, doing a search, or choosing them from your schedule.
There are two steps to this process: adding the class to your shopping basket in the first step, and reviewing your shopping cart and completing the enrolling process in the second.
Adding a class to your shopping cart: Entering a class number
You can add a class if you know the class number for the section of the class you want to add.
1.Select the Enter button after entering the class number in the Enter Class Nbr area. The enrollment preferences page, which has information on the class section, appears. You will be taken back to the previous page by choosing the Cancel button.
2.Select the Next button to finish adding the class to your schedule.
3.The class is added to your shopping cart, and then a confirmation notice appears.
A class is being added to your shopping cart: Utilizing class search
If you do not know the class number for the segment of the class you wish to add to your schedule, you can use the class search website to look up the class.
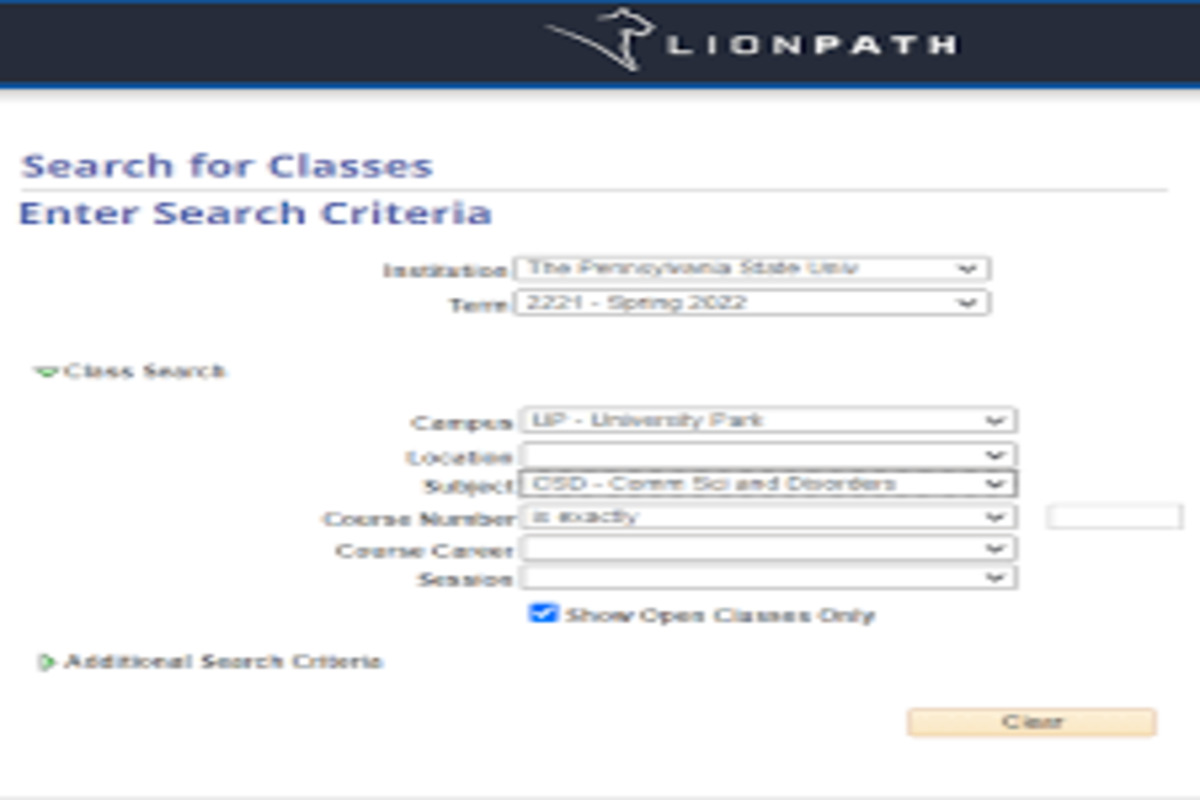
1.Select the radio button for Class Search.
choosing the Search button
2.In the Class Search and Additional Search Criteria areas, enter your search criteria.
3.display the filtered class list after selecting the criteria, click the Search button.
4.Click the Select button after finding the class portion you want to schedule.
5.Remember to pick the radio button next to the associated portion you want to register for when the class you are adding has a linked class component, such a lab.
6.Select the Next button to finish adding the class to your schedule.
7.The class is added to your shopping cart, and then a confirmation notice appears.
Adding a class to your shopping cart: Using My Planner
Based on a course that is already mentioned in your planner, you can add that class to your buying basket.
To view the courses listed in your planner that are allocated to the chosen term, pick the My Planner radio button and click the Search button.
To add a course to your purchasing cart, click the Select button to its right.
The chosen course’s class portions will be shown. Click the Select button after finding the class portion you want to schedule.
Select the Next button to keep adding the class to your itinerary.
The class is added to your shopping cart, and then a confirmation notice appears.
Completing the enrollment process
You are prepared to complete the enrolling procedure once you’ve added the classes you want to take to your shopping basket.
Pick the button that says “Proceed to Step 2 of 3.”
To finish the procedure and add the courses to your schedule, click Finish Enrolling.
Verify your enrollment in the chosen classes by looking at the outcomes.
You can add more classes or choose the My Class Schedule button to check your schedule when you have done verifying the results.

Be the first to comment